|
Installation Tips And Best Practices by Frank. For product support, call or text 8am to 8pm daily (250) 888 9982: 1. Polycarbonate twinwall is easy to cut with a circular saw using a fine tooth blade (40-60 tooth or better). Table saw is ok too. Material masking protects from scratches. 2. Our polycarbonate twinwall has a masking on BOTH sides. Remove both sides after cutting. IMPORTANT: The WHITE masked side is the UV protected side. This must face UP, toward the sun. When you remove the white masking, mark the UV side with a strip of green painter's tape temporarily, removing it after you have laid the correct side down. 3. H channel joins sheets on a roof and they do not leak (no H channel required for side walls but battens do look good as per the image below). U channel caps only the 4ft ends of each sheet so that insects do not find their way inside. You can also use aluminum tape at the top of your sheet if it is hidden but it is advised that you use U channel at the bottom as you will need to drill a weeping hole every 6-12 inches at the bottom of a cell in order to allow condensation to escape laterally through the U channel. 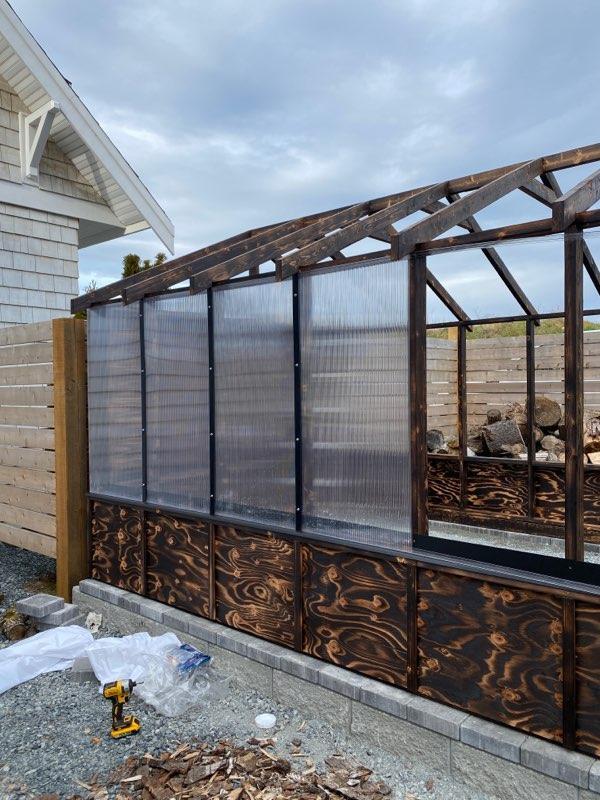 4. The maximum roofing joist spacing is 24 inches. Every second rafter should be moved over 9/16 inch in order for H channel to fall centered on every second rafter. H channel must be on the rafter unless you have purlins. If you already have a roof and you do not want to move rafters, you can strap the roof every 24 inches (purlins) and then place your roof on top of that. 5. Cut your H channel joiners approx 1.5in. short, so U channel end caps can go on in continuous lengths. This provides good surface compression strength especially at the eve of your roof where snowload can exert enough pressure to tear off your U channel. Add a bead of silicon here for additional adhesion. 6. A simple way to install H channel is to FIRST secure your sheets to the roof through the center of each sheet remembering to leave a 9/16 inch gap between sheets. Make yourself 2 spacers to make sure you have the correct width at the top and bottom. Then lubricate your H channel using warm water and dish soap and starting from the eve of the roof, slide your H channel between the two sheets. As you get most of the H channel on, use a rubber mallet to tap the remaining section onto your roof as it will get more difficult the higher you go. 7. Sheets are secured to your roof using metal roofing screws with the neoprene washer built in. These are available at Home Depot, Home Hardware or Rona. Select the 1 1/2 inch length min.. They come in black, white and galvanized colors. Don't forget to pickup a nut driver for your drill and a drill bit for pre-drilling your holes. 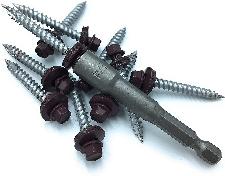 8. Pre-drill mounting holes. For example, if it is a #6 screw, bore a #8 hole for expansion and contraction. Do not compress the sheet as you fasten (no depressions). Secure your screws flush with the material face ensuring your washer is covered. 9. A 4ft x 8ft sheet, for example, will have 15 fasteners (see image below). 3 at the zero mark (1 or 2 inches from the start point), then 3 more at 2ft, 4ft, 6ft and finally the end of the sheet. A 4x10 sheet will have 18 fasteners, a 4x12, 21 and a 4x16 will have 27. Buy extra screws just in case you lose 1 or 2. 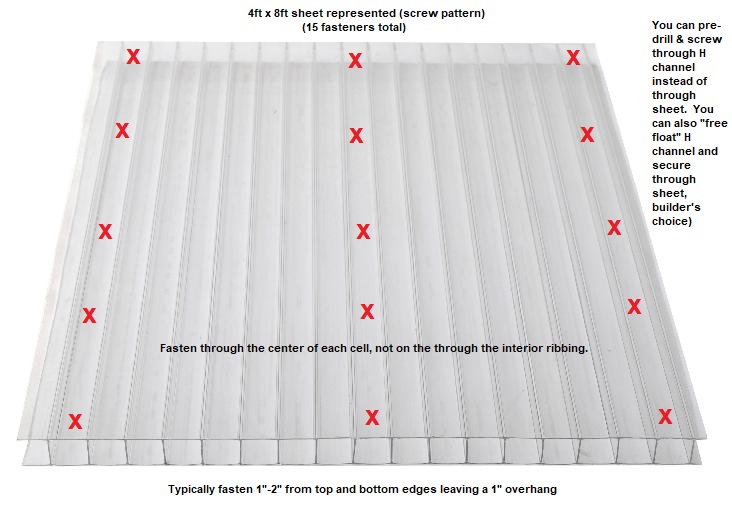 10. You can shingle polycarbonate twinwall. Thus, if you want to span 24ft, use a 16ft sheet and a 10ft sheet, overlapping the bottom course by at least 6 inches. Silicon the bottom edge to avoid water and debris ingress under the shingle joint. This will keep things clean. 11. Polycarbonate twinwall is designed to form a radius over the length of the sheet, for example, a 4x12ft sheet can form a 6ft radius. Similarly, H channel joiners are designed to do the same. The image below is a customer supplied photo, just off Shelbourne St. in Victoria. 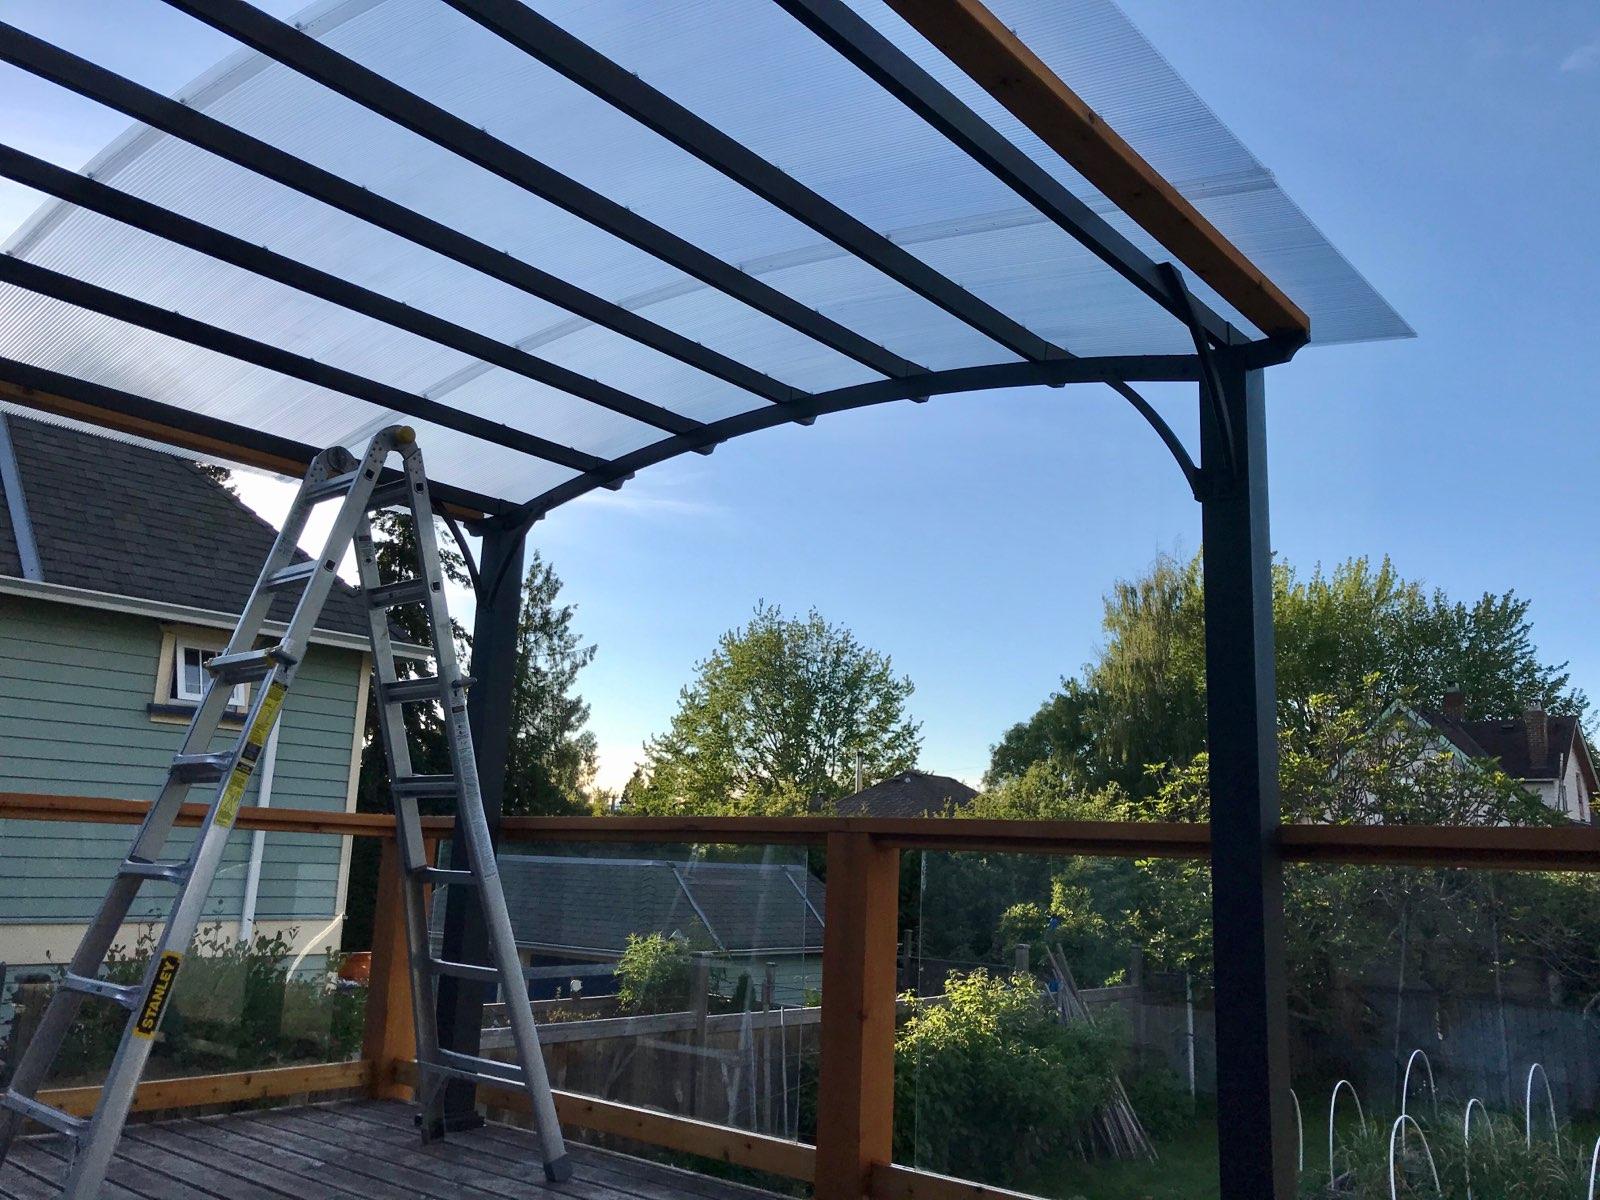 Recommended Tools: *Circular saw, fine blade (long cuts) *Jig saw, metal blade (holes and windows) *Chop saw or metal hack saw for cutting H channel *Drill with stop *Nut driver *Drill bit *Rubber mallet *2 x 9/16 inch spacers of any type *Gloves for material handling (edges are sharp!) *Caulking gun with 100% Silicon (only 100% Silicon!) *Metal roofing screws 1.5in. min. (see install tip #7 below) *Rag, Dish soap and warm water (see install tip #6 below) *Fully enclosed safety glasses when cutting polycarbonate! *Ear plugs ©2019-2022 The Upgrade Path Inc., DBA ClearCO.ca. Email: clearco.ca.manufacturing@gmail.com Address: #14-4970 Polkey Rd., Duncan BC, V9L 6W3. Text/Talk 250 888 9982. |